What you’ll do
- Open the Models page.
- Choose a model source.
- Submit model details and metadata.
- Verify ingestion and status.
- Confirm model visibility in the repository.
Prerequisites
- Access to Bud AI Foundry.
- Permission to add models.
- One of the following:
- cloud provider access,
- Hugging Face model URI,
- signed URL for model artifact, or
- disk/server path for local artifact.
Step 1: Open Models
- Sign in to Bud AI Foundry.
- Navigate to Models from the left sidebar.
- Confirm you can view the model repository page.
Step 2: Start onboarding
- Click + Model.
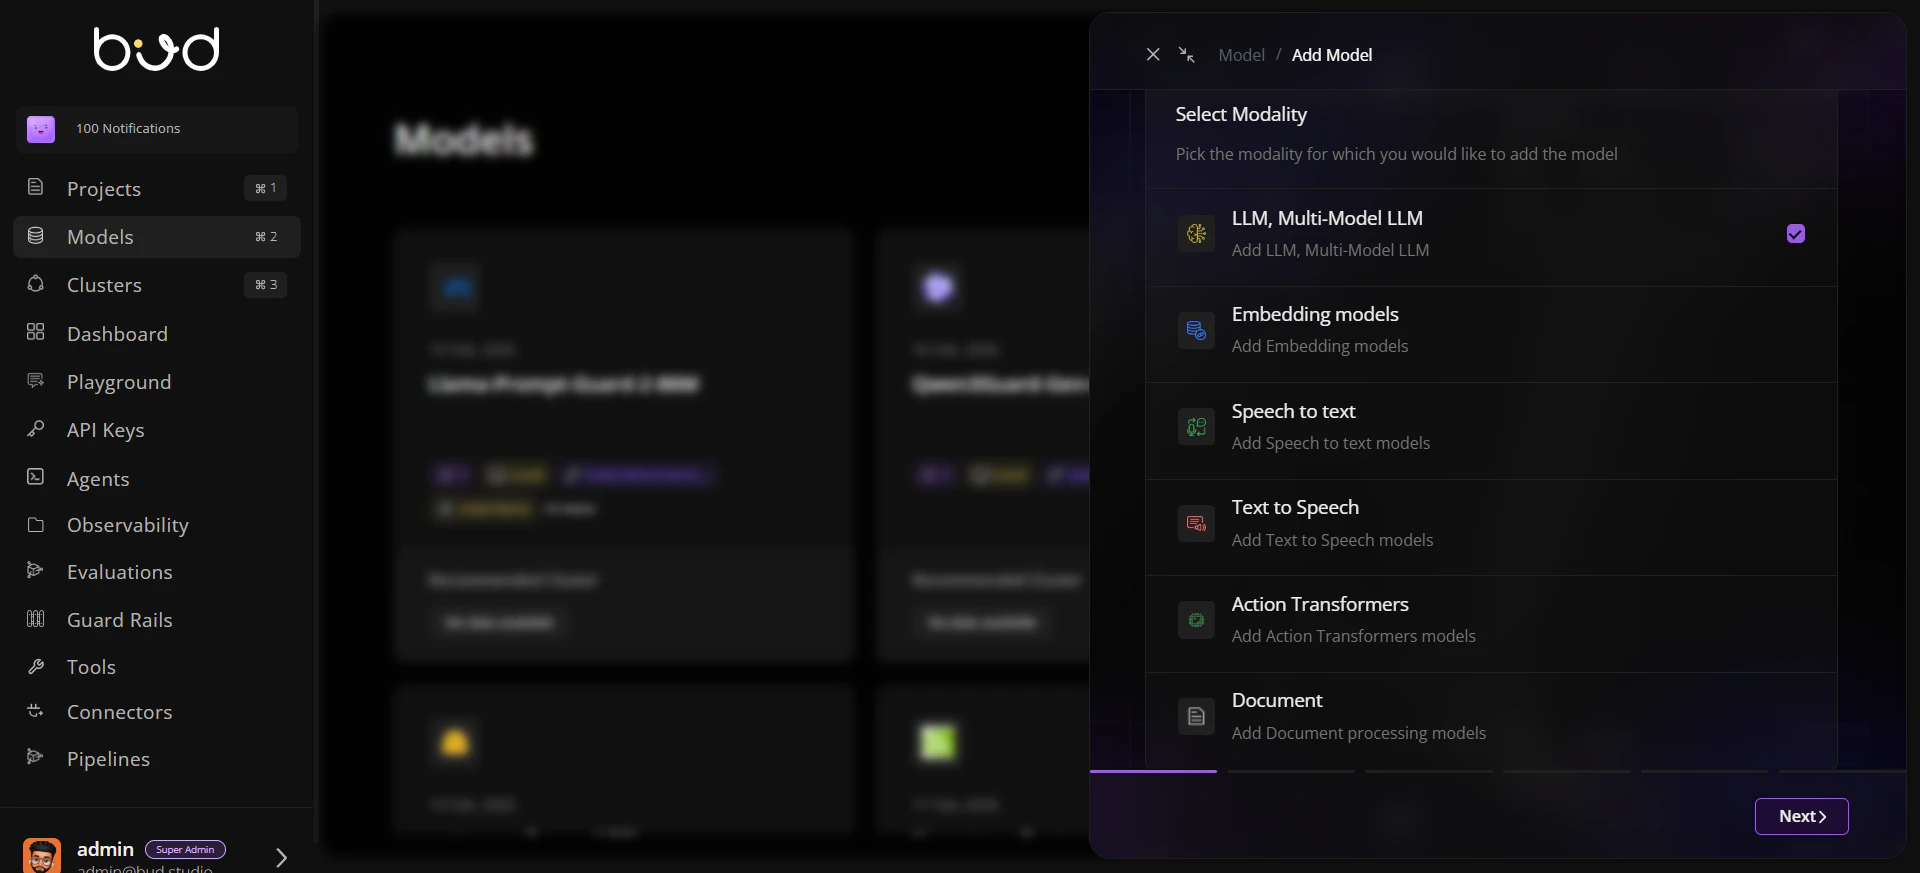
- Select the target modality.
- Select a source type:
- Cloud
- Hugging Face
- URL
- Disk
Step 3: Configure model details
Provide required fields for the selected source:- model name,
- URI or provider mapping,
- author/tags,
- modality and endpoint-related metadata.
Step 4: Submit and monitor status
- Submit the onboarding form.
- Watch progress for ingestion or linking.
- Open model details to confirm readiness indicators.
Step 5: Validate repository presence
- Return to the model list.
- Search by name and verify metadata appears as expected.
- Check recommended cluster and capability context where available.
Success criteria
The model appears in the repository list.
Metadata (name, tags, source) is correct.
Verification/security indicators are visible.
Next steps
- Continue with Creating Your First Model for an end-to-end walkthrough.
- Review Model Concepts to understand governance and lifecycle states.