> ## Documentation Index
> Fetch the complete documentation index at: https://docs.budecosystem.com/llms.txt
> Use this file to discover all available pages before exploring further.
# Quick Start
> Create your first pipeline in 5 minutes
This guide walks you through creating a model deployment pipeline: add a model from HuggingFace, then deploy it to a cluster.
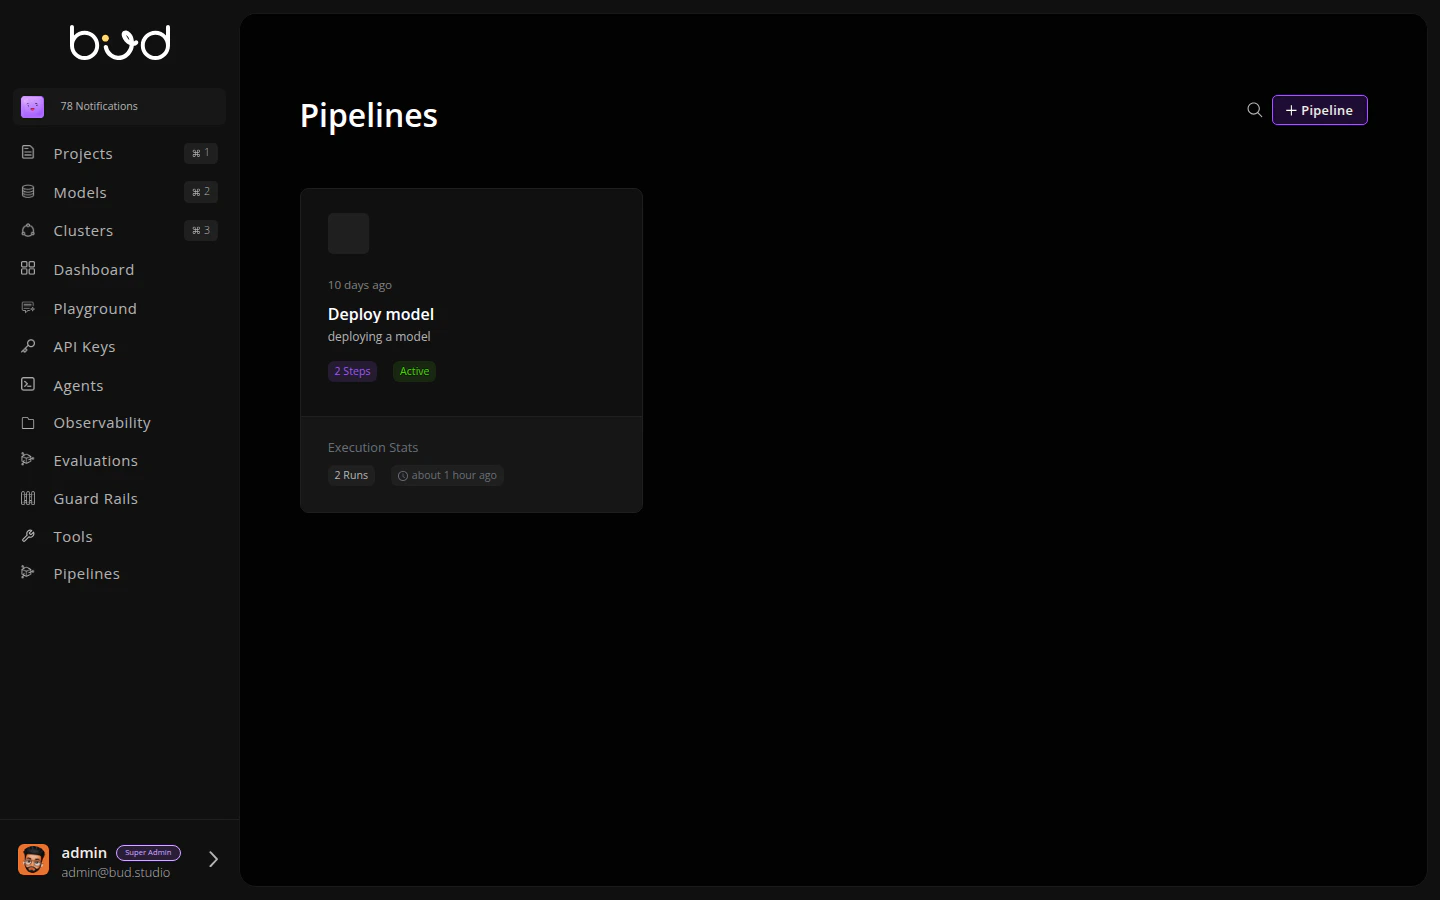
## Step 1: Navigate to Pipelines
1. Log in to [Bud AI Foundry](https://admin.dev.bud.studio)
2. Click **Pipelines** in the left sidebar
3. Click the **+ Pipeline** button
 ## Step 2: Name Your Pipeline
1. Enter a name: "Model Deployment Pipeline"
2. Add a description: "Add and deploy a model from HuggingFace"
3. Click **Create**
## Step 3: Add Actions
The pipeline editor opens with a visual canvas. Let's build the workflow:
### Add Model Action
1. From the **Actions** panel on the right, expand **Model Operations**
2. Drag **Add Model** onto the canvas
3. Click the action to configure it:
* **Model URI**: `meta-llama/Llama-3.2-1B-Instruct`
* **Model Name**: `Llama-3.2-1B-Instruct`
* **Model Source**: `hugging_face`
4. Click **Save**
## Step 2: Name Your Pipeline
1. Enter a name: "Model Deployment Pipeline"
2. Add a description: "Add and deploy a model from HuggingFace"
3. Click **Create**
## Step 3: Add Actions
The pipeline editor opens with a visual canvas. Let's build the workflow:
### Add Model Action
1. From the **Actions** panel on the right, expand **Model Operations**
2. Drag **Add Model** onto the canvas
3. Click the action to configure it:
* **Model URI**: `meta-llama/Llama-3.2-1B-Instruct`
* **Model Name**: `Llama-3.2-1B-Instruct`
* **Model Source**: `hugging_face`
4. Click **Save**
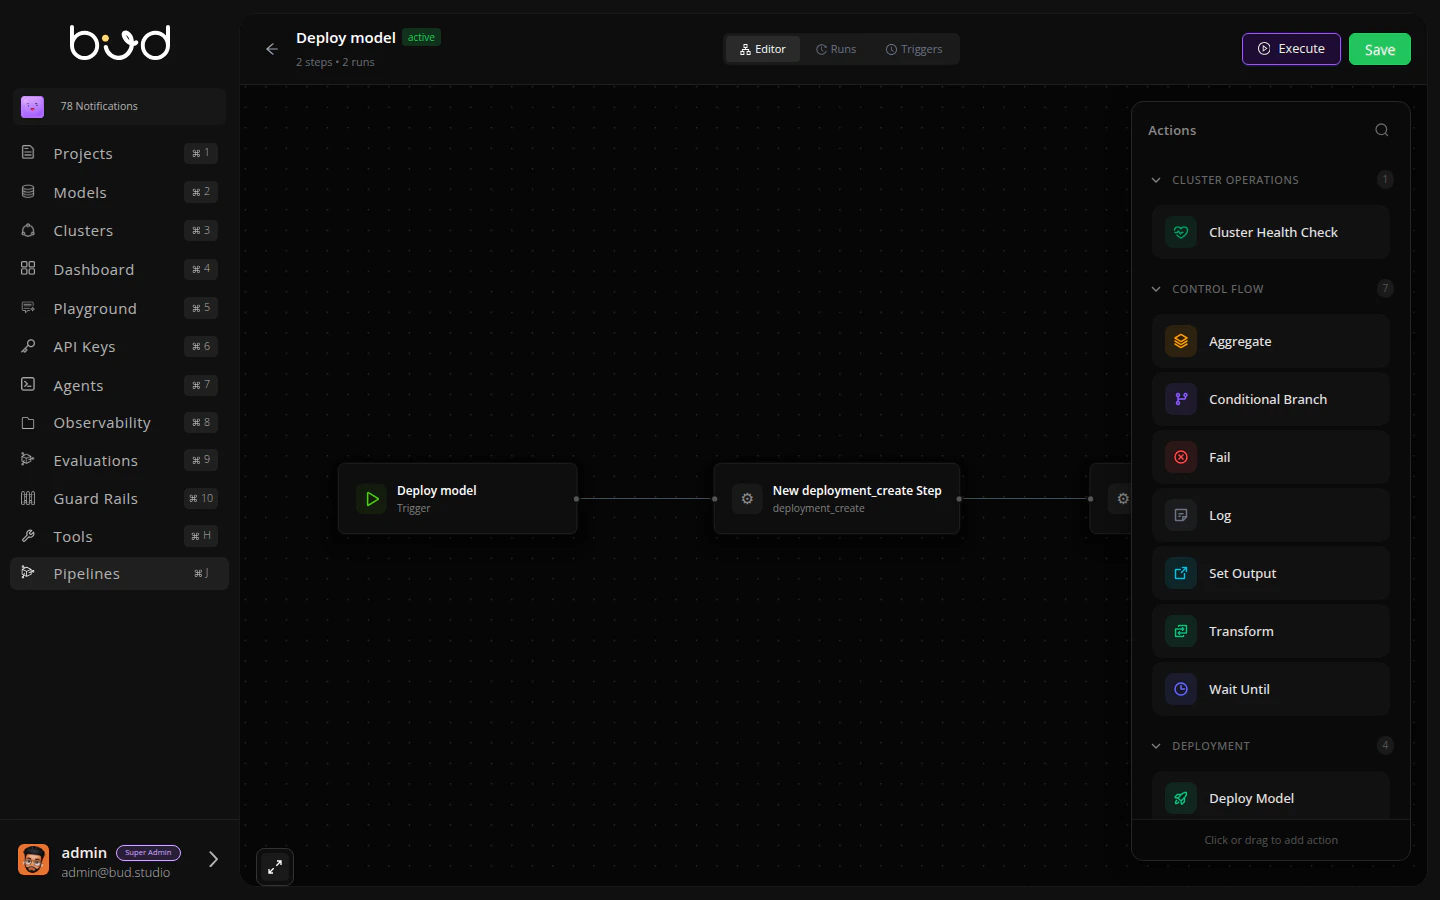 ### Deploy Model Action
1. From the **Actions** panel, expand **Deployment**
2. Drag **Deploy Model** onto the canvas
3. Connect the actions: click the dot on Add Model and drag to Deploy Model
4. Configure the deployment:
* **Model ID**: `steps.add_model.output.model_id`
* **Cluster ID**: Select your cluster from dropdown
* **Deployment Name**: `llama-deployment`
5. Click **Save**
### Add Set Output
1. Drag **Set Output** action after Deploy Model
2. Connect Deploy Model → Set Output
3. Configure:
* **Key**: "endpoint\_url"
* **Value**: `steps.deploy_model.output.endpoint_url`
4. Click **Save**
## Step 4: Execute the Pipeline
1. Click the **Execute** button in the top-right
2. Click **Run**
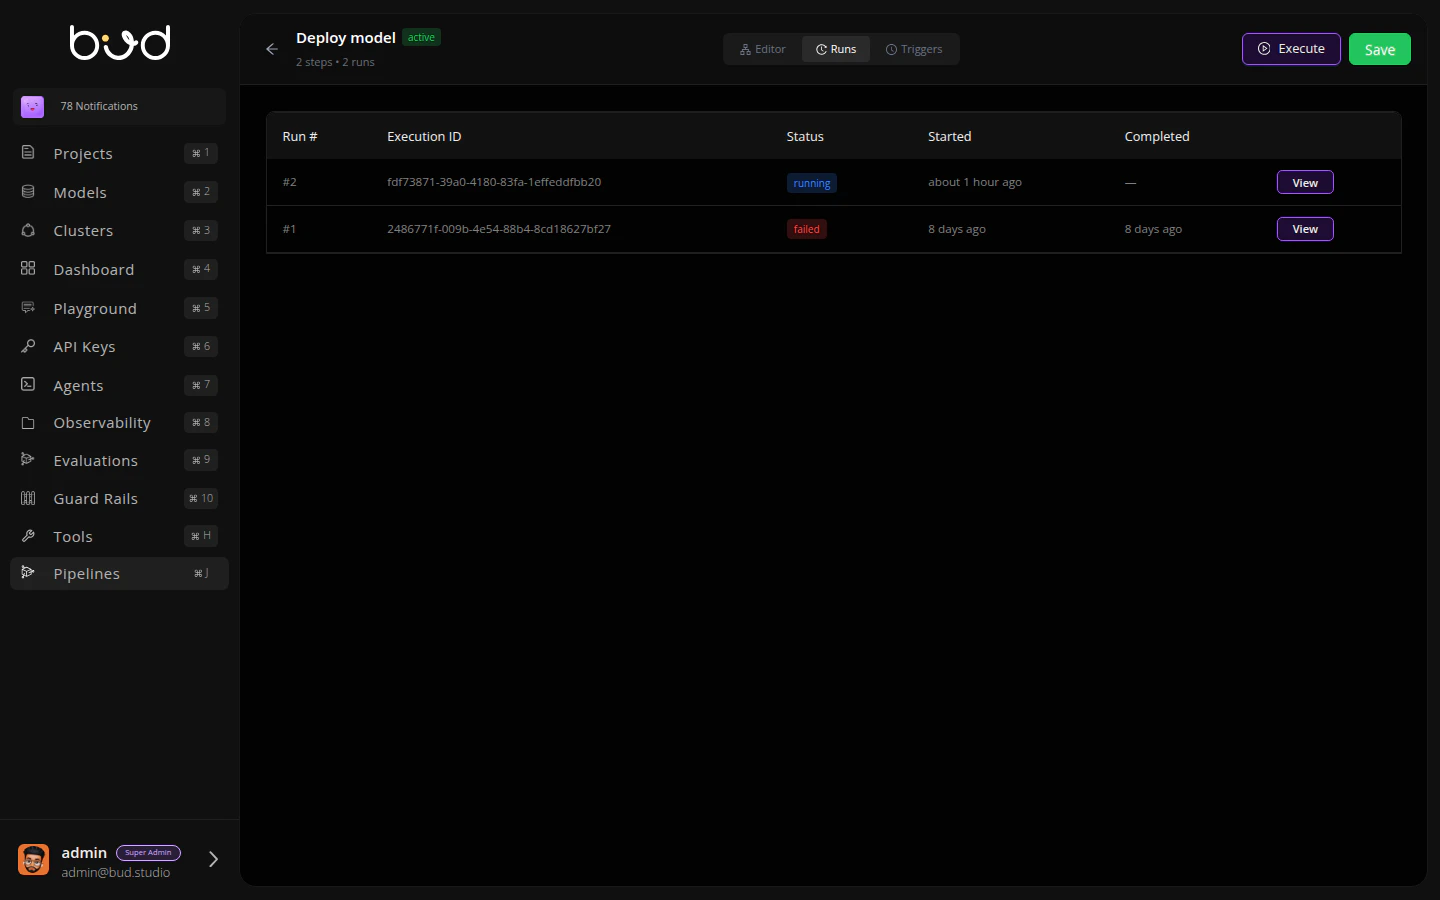
## Step 5: Monitor Execution
1. Click the **Runs** tab
2. You'll see your execution progress through each step
3. Click **View** to see detailed logs and outputs
### Deploy Model Action
1. From the **Actions** panel, expand **Deployment**
2. Drag **Deploy Model** onto the canvas
3. Connect the actions: click the dot on Add Model and drag to Deploy Model
4. Configure the deployment:
* **Model ID**: `steps.add_model.output.model_id`
* **Cluster ID**: Select your cluster from dropdown
* **Deployment Name**: `llama-deployment`
5. Click **Save**
### Add Set Output
1. Drag **Set Output** action after Deploy Model
2. Connect Deploy Model → Set Output
3. Configure:
* **Key**: "endpoint\_url"
* **Value**: `steps.deploy_model.output.endpoint_url`
4. Click **Save**
## Step 4: Execute the Pipeline
1. Click the **Execute** button in the top-right
2. Click **Run**
## Step 5: Monitor Execution
1. Click the **Runs** tab
2. You'll see your execution progress through each step
3. Click **View** to see detailed logs and outputs
 Once complete, you'll have a deployed model endpoint ready to serve inference requests! 🎉
## Using the SDK
You can also create and execute pipelines programmatically:
```python theme={null}
from bud import BudClient
client = BudClient()
# Execute the Add Model → Deploy Model pipeline
execution = client.executions.run_ephemeral(
pipeline_definition={
"name": "Model Deployment Pipeline",
"steps": [
{
"id": "add_model",
"name": "Add Model",
"action": "model_add",
"params": {
"model_uri": "meta-llama/Llama-3.2-1B-Instruct",
"model_name": "Llama-3.2-1B-Instruct",
"model_source": "hugging_face"
},
"depends_on": []
},
{
"id": "deploy_model",
"name": "Deploy Model",
"action": "deployment_create",
"params": {
"model_id": "{{steps.add_model.output.model_id}}",
"cluster_id": "cluster_abc123",
"deployment_name": "llama-deployment"
},
"depends_on": ["add_model"]
}
],
"outputs": {
"endpoint_url": "{{steps.deploy_model.output.endpoint_url}}"
},
"description": "Add and deploy a model from HuggingFace"
},
wait=True
)
print(f"Status: {execution.status}")
print(f"Endpoint: {execution.outputs.get('endpoint_url')}")
```
For advanced SDK usage, see the [API Reference](/developer-docs/api-reference) (coming soon).
## Next Steps
Learn about DAGs and action types
Build more complex workflows
Common issues and solutions
Once complete, you'll have a deployed model endpoint ready to serve inference requests! 🎉
## Using the SDK
You can also create and execute pipelines programmatically:
```python theme={null}
from bud import BudClient
client = BudClient()
# Execute the Add Model → Deploy Model pipeline
execution = client.executions.run_ephemeral(
pipeline_definition={
"name": "Model Deployment Pipeline",
"steps": [
{
"id": "add_model",
"name": "Add Model",
"action": "model_add",
"params": {
"model_uri": "meta-llama/Llama-3.2-1B-Instruct",
"model_name": "Llama-3.2-1B-Instruct",
"model_source": "hugging_face"
},
"depends_on": []
},
{
"id": "deploy_model",
"name": "Deploy Model",
"action": "deployment_create",
"params": {
"model_id": "{{steps.add_model.output.model_id}}",
"cluster_id": "cluster_abc123",
"deployment_name": "llama-deployment"
},
"depends_on": ["add_model"]
}
],
"outputs": {
"endpoint_url": "{{steps.deploy_model.output.endpoint_url}}"
},
"description": "Add and deploy a model from HuggingFace"
},
wait=True
)
print(f"Status: {execution.status}")
print(f"Endpoint: {execution.outputs.get('endpoint_url')}")
```
For advanced SDK usage, see the [API Reference](/developer-docs/api-reference) (coming soon).
## Next Steps
Learn about DAGs and action types
Build more complex workflows
Common issues and solutions