> ## Documentation Index
> Fetch the complete documentation index at: https://docs.budecosystem.com/llms.txt
> Use this file to discover all available pages before exploring further.
# Creating Your First Cluster
> Step-by-step workflow to onboard, validate, and prepare a cluster
## What You'll Build
In this walkthrough, you will:
1. Register a new or existing cluster.
2. Validate health and node readiness.
3. Review running deployments on the cluster.
4. Configure default storage settings.
## Prerequisites
* Access to Bud Admin with cluster management permissions.
* Kubernetes cluster details (provider context, kube config, and ingress URL as needed).
* Network path from Bud control plane to cluster APIs.
## Step 1: Start Cluster Onboarding
1. Go to **Clusters**.
2. Click **+ Cluster**.
3. Select **Create New Cluster** or **Connect to Existing Cluster**.
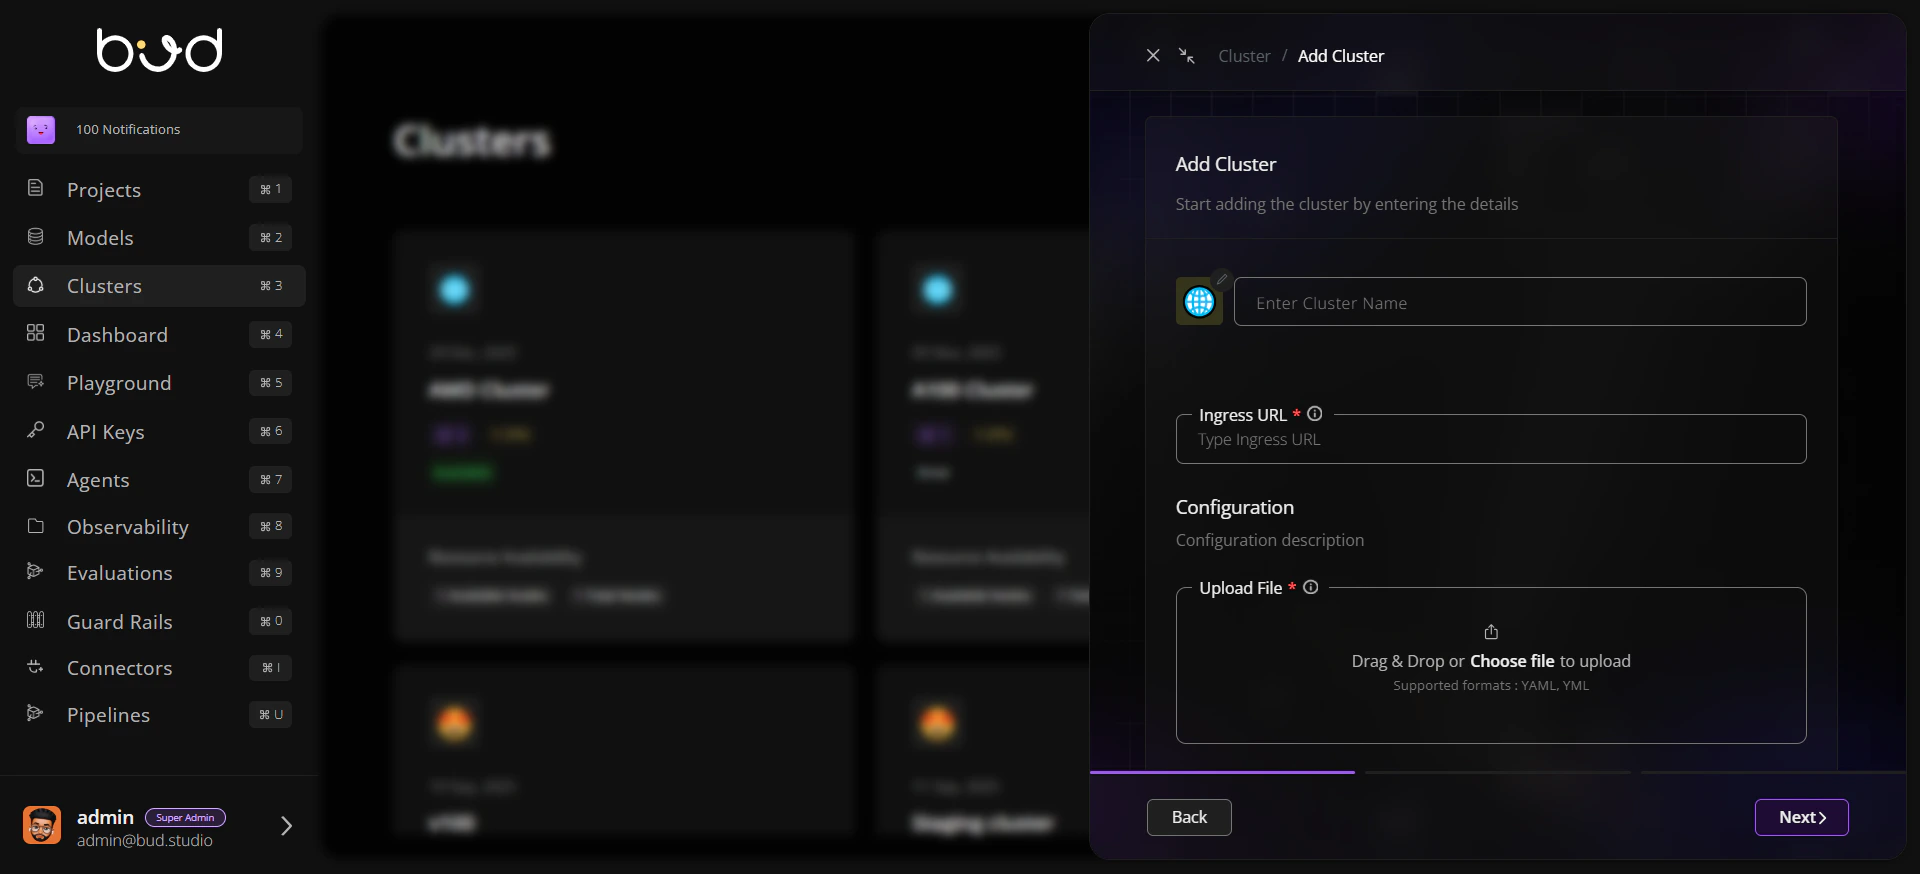
## Step 2: Enter Core Configuration
1. Set cluster name and icon/identifier.
2. Choose provider or upload existing cluster configuration.
3. Provide ingress URL and required connection details.
4. Continue to submit onboarding.
 ## Step 3: Confirm in Cluster Listing
1. Return to cluster list view.
2. Verify the new cluster appears.
3. Review endpoint and hardware indicators.
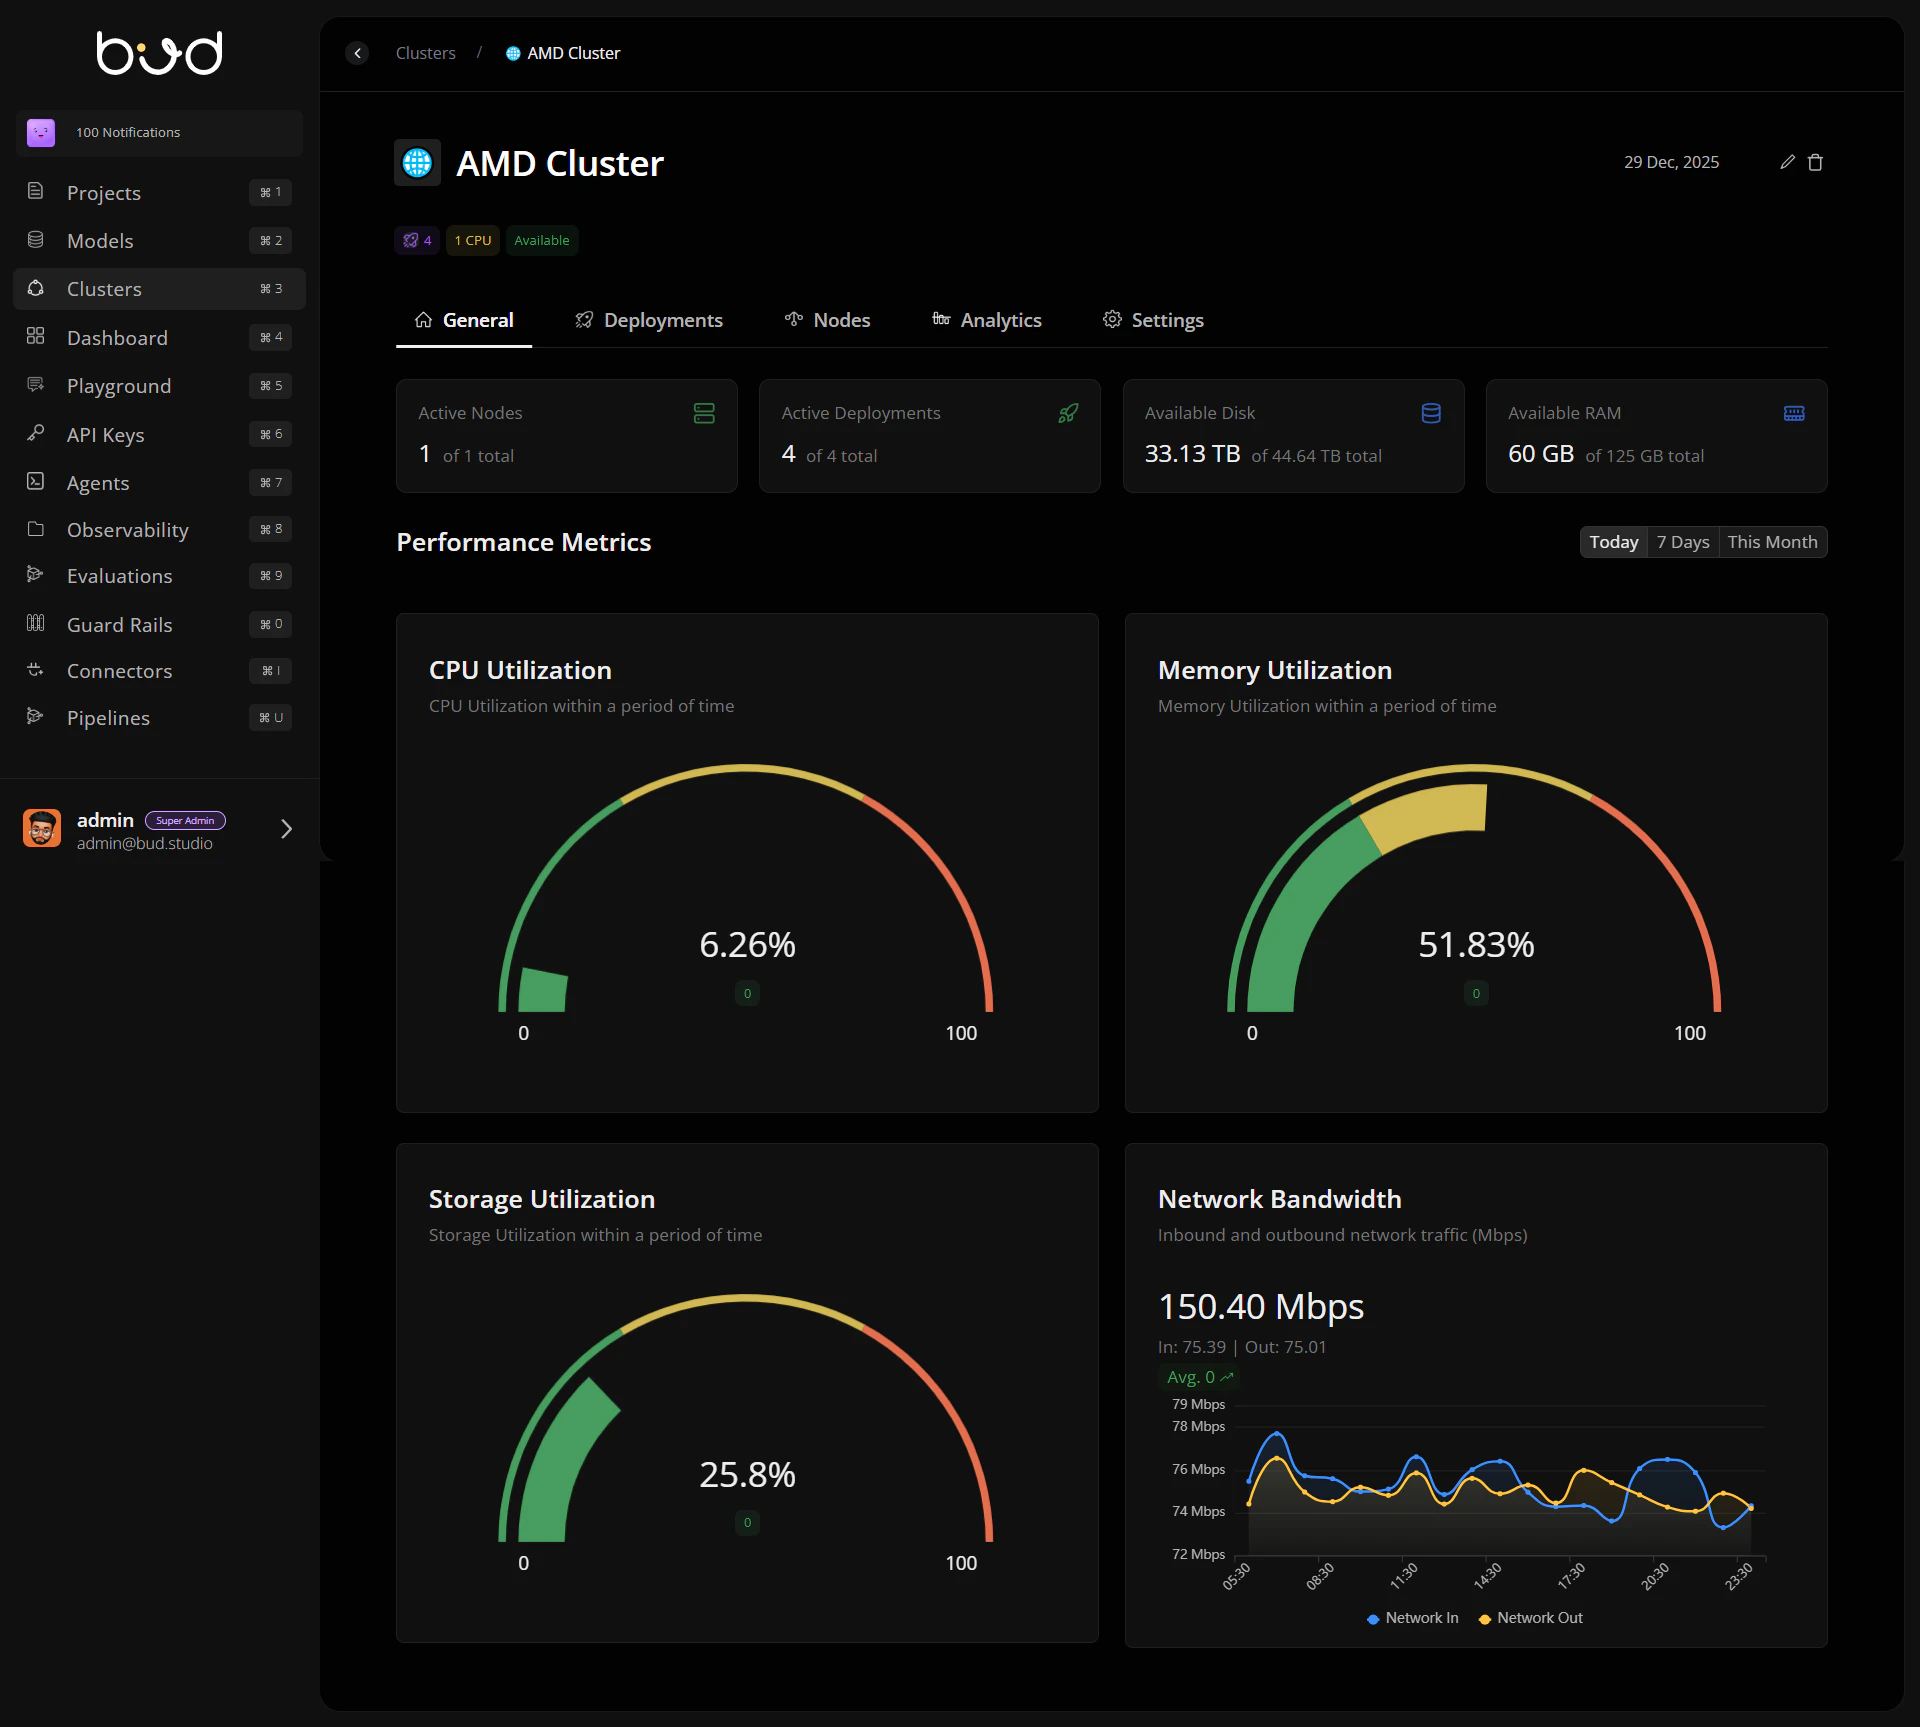
## Step 4: Validate General Health
1. Open the cluster details page.
2. In **General**, check available nodes and resource summaries.
3. Use time filters to compare recent utilization.
## Step 3: Confirm in Cluster Listing
1. Return to cluster list view.
2. Verify the new cluster appears.
3. Review endpoint and hardware indicators.
## Step 4: Validate General Health
1. Open the cluster details page.
2. In **General**, check available nodes and resource summaries.
3. Use time filters to compare recent utilization.
 ## Step 5: Inspect Nodes and Events
1. Open **Nodes** tab.
2. Validate ready status and request-vs-allocatable signals.
3. Use **See More** on a node to inspect event details.
## Step 6: Configure Storage Defaults
1. Open **Settings** tab.
2. Select default storage class from discovered options.
3. Apply recommended access mode where appropriate.
4. Save and verify persistence.
## End-to-End Workflow
```mermaid theme={null}
flowchart LR
A[Create or Connect Cluster] --> B[Save Configuration]
B --> C[Cluster Appears in List]
C --> D[General Health Check]
D --> E[Node Event Validation]
E --> F[Set Storage Defaults]
F --> G[Cluster Ready for Deployments]
```
## Operational Checklist
Cluster appears in list and is selectable.
General tab shows healthy resource indicators.
Nodes tab has no unresolved critical events.
Settings are saved with expected storage defaults.
## Next Steps
Learn day-2 management patterns
Handle onboarding and runtime issues quickly
## Step 5: Inspect Nodes and Events
1. Open **Nodes** tab.
2. Validate ready status and request-vs-allocatable signals.
3. Use **See More** on a node to inspect event details.
## Step 6: Configure Storage Defaults
1. Open **Settings** tab.
2. Select default storage class from discovered options.
3. Apply recommended access mode where appropriate.
4. Save and verify persistence.
## End-to-End Workflow
```mermaid theme={null}
flowchart LR
A[Create or Connect Cluster] --> B[Save Configuration]
B --> C[Cluster Appears in List]
C --> D[General Health Check]
D --> E[Node Event Validation]
E --> F[Set Storage Defaults]
F --> G[Cluster Ready for Deployments]
```
## Operational Checklist
Cluster appears in list and is selectable.
General tab shows healthy resource indicators.
Nodes tab has no unresolved critical events.
Settings are saved with expected storage defaults.
## Next Steps
Learn day-2 management patterns
Handle onboarding and runtime issues quickly